I didn’t realize how many animals we encountered until I put this post together! I’m not sure if we saw more dogs or camelids.


Love these guys — they work so hard…such is the Peruvian way.
I didn’t realize how many animals we encountered until I put this post together! I’m not sure if we saw more dogs or camelids.


Love these guys — they work so hard…such is the Peruvian way.
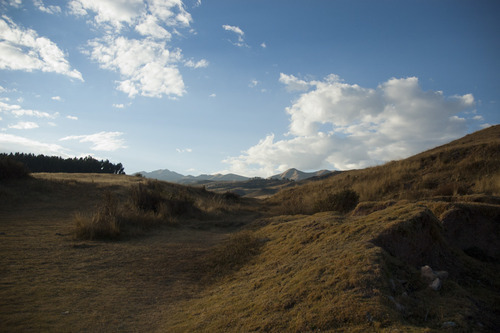
(spur-of-the-moment horseback ride in Cusco)
Don’t Plan Ahead
When I backpacked through Europe, arriving in a city sans hostel was often very stressful. It left me willing to settle on the first hostel I came across no matter the price or condition. Since I’d never visited Peru, and since we had a stricter schedule, we booked almost every single thing in advance — hostels/planes/buses/activities/tours. As it turns out, we didn’t need to do any of that, and luckily we were able to drop a lot of our plans and work through Peru much more freely.
Everyone wants to feed/house/help you somehow. In Arequipa, we arrived and just went searching for a hostel. There are an abundance of policewomen and we found them extremely helpful and generous. This is how we found our cheapest and favorite places…places that don’t have an online presence.
Now I know searching for a hostel upon arrival isn’t everyone’s cup of coca tea (and I would never suggest doing that in Lima)…but there are many other ways to take advantage of this “travel freedom” in Peru. Local buses are an adventure. They seem to always be running to all cities and they are very reasonably priced (I took a 7 hour bus for $5 that I booked that very morning). Take buses, mottos, combis, and even taxis. Just be open minded, and know that, on a bus, you may not get a seat.
As for tours, you can typically set up any tour a day or two before it happens…even to Machu Picchu. Tour groups can be very hit or miss though, so ask fellow travelers or your hostel if they have any recommendations.
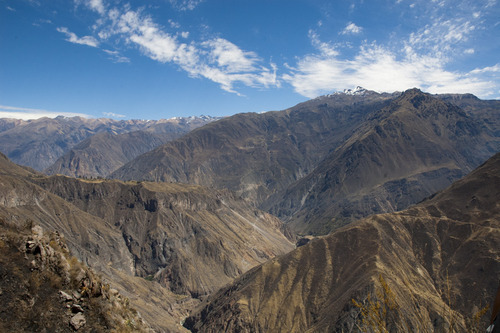
(the Colca Canyon)
Know what you want to do and when you’ll be in which cities, but besides that, travel and plan freely. ■
Speak Spanish
Okay, easier said than done I know. But seriously, this is a big one. If you can, take someone with you who speaks Spanish, or at the very least spend several weeks before you go brushing up on conversational Spanish. I’m talking simple things like “how old are you,” ”what do you do,” ”is it near or far,” ”what do you enjoy doing around here?” If you’re familiar with any romance language, you’ll be able to catch on easily.
I traveled with my cousin, Austin, who is fluent in Spanish. It made a huge difference in our experience. (Almost) everyone we met was extremely nice and more than willing to help or just share their lives. As soon as someone opened up to us, it felt like a huge gap was bridged and it was easy to see that our lives aren’t so completely different. ■
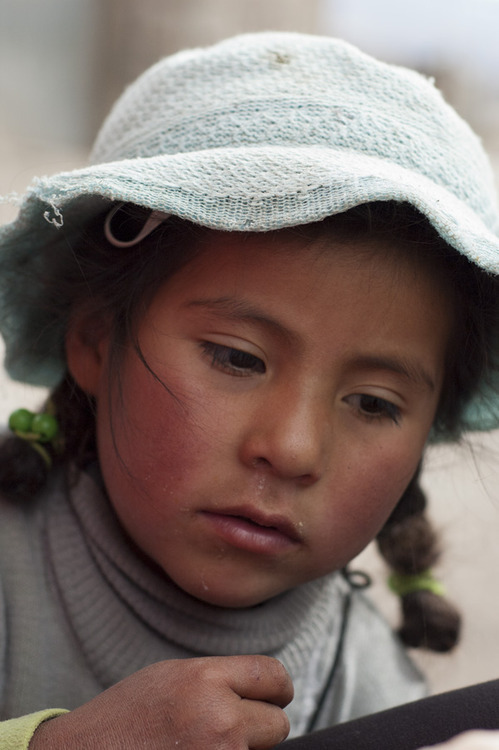
(our sweet friend Mirabel who we befriended outside a restaurant thanks to a little Spanish)
Go Big at Machu Picchu
Since it was sort of obvious we would see Machu Picchu, I didn’t spend much time researching it. We bought our tickets from this website (after a lot of hassle), and only managed thanks to this wonderful step-by-step guide. We also purchased Huayna Picchu tickets just for the hell of it even though neither of us really knew what it was all about.
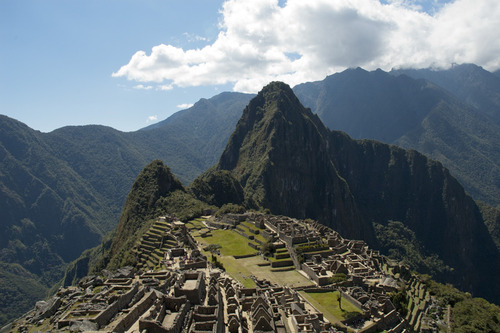
Two things to note here…1. Go big or go home. If you are seeing Machu Picchu, plan to either do the Inca Trail, climb Huayna Picchu (the big mountain in the picture above), or climb Machu Picchu (the mountain on the other side of the ruins). Don’t get me wrong, the actual ruins were amazing and we took a fascinating tour where we learned a lot of their history. But if we hadn’t randomly decided to hike Huayna Picchu, I think I would have been a little underwhelmed by Machu Picchu.
It takes a lot of effort to get there, including taking expensive (albeit lovely) trains, staying in the all but shitty town of Agues Calientes, and jumping through a few other various hoops. All I’m saying is it’s a trial in itself just to get to Machu Picchu so you want to get the best bang for your buck. Take a tour, climb the mountains, and sneak snacks in so you can spend all day there. Once you’re done and can barely move (like us), you can take a nap in a field with some llamas (while eating dried coca leafs from a nice German man and getting a knee-high sunburn on your legs).
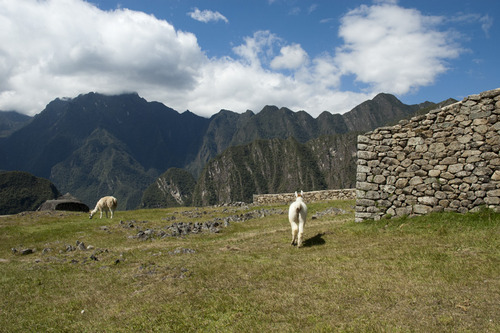
Wow what a ramble…I forgot what my #2 was…no seriously… oh yeah, doing Machu Picchu without a guided tour. There are many tour agencies that will book everything for you so you can go enjoy Machu Picchu with much less thought. We decided to do it by ourselves so we could go at our own pace/choose our own hostels/be without a large group/etc. And though it was a bit of a hassle, I think it was the right choice. But if you are going it alone just to save money forget it. We probably only saved $100 in the long run. There is really too much to say on this subject so If you have more questions about doing Machu Picchu alone, please email me. ■
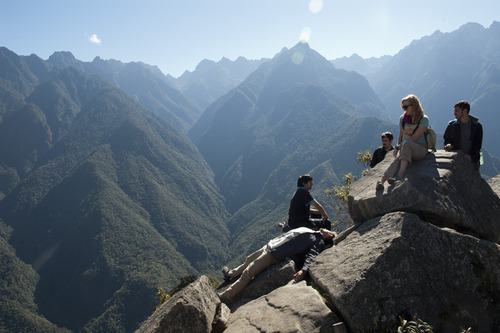
(just hanging at the crest of Huayna Picchu (“Young Mountain”); this really is a once-in-a-lifetime view)
Don’t Feel Bad if you Don’t Love the Food
Clearly I love food…more than half this blog is about eating. So I was extremely excited about trying Peruvian food. I went really hard the first 3 days and even took an awesome cooking class. I was popping alpaca and alfajores and potatoes like there was no tomorrow. And then tomorrow came…and I was gonna beat some ass if I found one more fry in my rice.
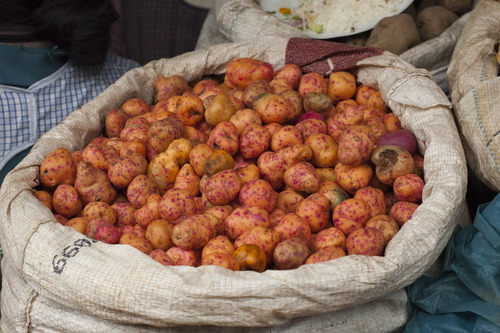
(1/5000 types of potatoes in Peru)
Peruvian food is very heavy and often very fatty. A very common meal is alpaca saltada (or a version of that) which is white rice with french fries mixed in, plus alpaca and vegetables. After my three days of binging I couldn’t even look at the stuff, and I spent many subsequent meals eating some delicious pasta and some mediocre pizza.
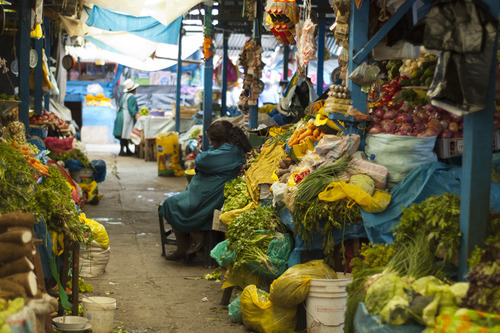
(el mercado - Cusco)
If you get a little burnt out, don’t worry, there are many delicious options. Do take advantage of all the fresh food Peru has to offer. Exotic fruits and vegetables abound. Might I suggest the lucuma (tastes like cookie dough), maracuyà, grenadilla, and the chirimoya, to name a few. Almost everything in Peru is organic. Take a stop at the juice stands in the markets; they’ll mix anything together for you.
There are also some delicious sandwich places that will make you feel like you are dining at a trendy spot in NY, but for Chick-fil-a prices. Jack’s in Cusco and especiallyLa Lucha in Lima (I seriously can’t recommend this last one enough) are some great options. I could go on and on about food though so feel free to email me if you have specific question.
And eat the picante Inka Chips…and then send me some because I’m having painful withdrawals ■
Skip Puno
This sounds harsh. And if you have time and money, yes, you should see the floating islands. All I’m saying is if you are sitting down right now, thoughtfully planning out your trip to Peru and find yourself needing to scratch something off the itinerary…make it Puno. To be brief, the town is ugly and seemingly seedy. There’s nothing to look at besides the lake which didn’t even blow my mind. And the floating islands leave a BIG something to be desired. They come off as very fake…especially when, during my 2 hour tour, approximately 4 minutes were devoted to history/explanation, and the rest of the time was spent shuffling us around to the “president’s” shop, and the cafés, and the markets.
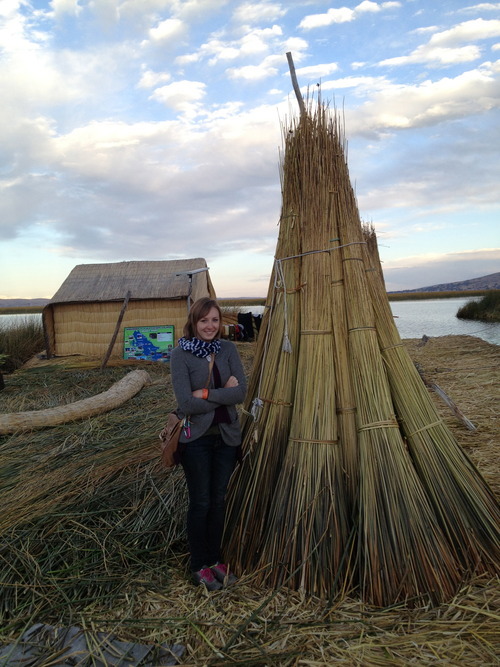
(freezing on the floating islands)
Anyways, everyone says you should go to the Bolivian side of the lake instead. ■
Beware of Lima
Yes, safety in Lima is an issue and we did find ourselves in a less than satisfactory situation our first night there…but this isn’t what I’m talking about. I’m saying beware of what the guidebooks say about Lima. This is when I wish Rick Steves did a series on South America…he’s always honest. If a place is worth skipping, he’ll tell you. Sure that place probably has some great things, but if you have a limited amount of time, it’s good to have an honest opinion. Guide books have to write something nice…and yes Lima can be nice. We stayed in Lima proper 1 night (do NOT bother unless you’re going to stay directly in the center) and in Miraflores for 2 nights.
I was excited to see Miraflores but when we got there I felt less like we were in Peru, and more like we were in NYC. It wasn’t the Peru I’d grown to love for the previous 3 weeks. We saw the beach, and watched some paragliders, and ate at the best restaurant ever…but in terms of time spent enjoying and experiencing the Peru I love, it was a waste. If you can skip it, I say do it. All flights from America will take you through Lima, but in my humble opinion, you should just book a flight right back out of there. ■
Try to Stay Healthy
We had a very hard time staying 100% healthy during our stay. Most of the time we had sinus issues and coughs, and one day I was sick in bed. But here are a few words of advice. 1 – Be easy on yourself. You’ll want to push yourself to do and see as much as possible while in Peru. But listen to your body and try to avoid staying in places for only 1 day. Traveling too much really takes it out of you. 2 – Be careful with the alcohol drinking in high altitude places like Cusco. Seriously, two drinks will put you out of commission the next day. Now is not the time to test your boundaries here. 3 – Drink lots and lots and lots of water, and then some. ■
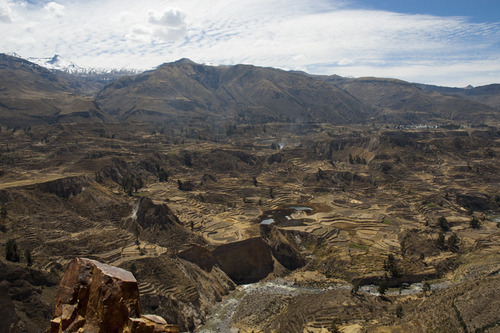
(Colca Canyon - make sure you are healthy and well rested before attempting this guy)
Soak It In
It’s going to be a truly unbelievable experience! ■
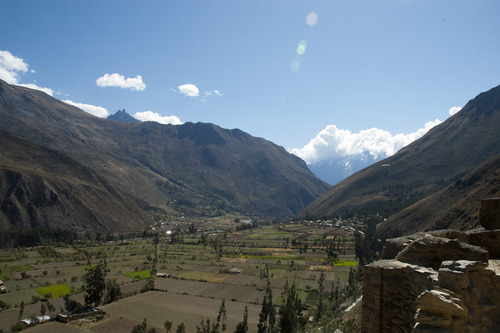
(on the ruins in Ollantaytambo)
Headed to Peru tomorrow with this girl. We’ve been cousins/friends/sisters since day 1 and have been wanting to travel together since we were about 15 and it’s finally here. See you guys in 3 weeks; hopefully with lots of good Peruvian recipes!

It’s almost been a year since I left for my 3 month long trek around Europe. Man, was I nervous that day and so on edge during the whole 9 hour plane ride. I didn’t know what I was getting myself into. My boyfriend came with me for the first three weeks, and I was even more of a wreck when he left me alone in Switzerland to return to America. But of course, it ended up being one of the best experiences of my life, and I’m so so so happy I went.
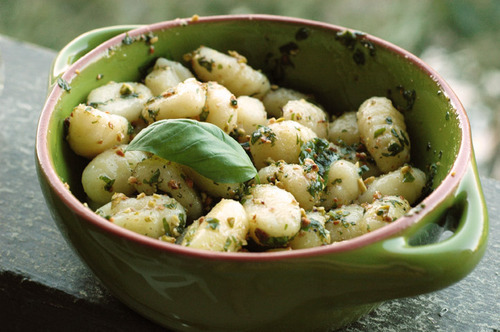
Later, a friend joined me and one of the places we visited was Cinque Terre. We went in late October when most of the tourists were gone, but it was still warm enough to enjoy the water. We stayed in Riomaggiore, and visited the 4 other “terres.” I had one of the best meals of my life there — pesto gnocchi. We sat outside enjoying the night air, drinking liters of wine that cost 1 euro, and enjoying the best olive oil, pesto, and pasta I’ll probably ever have. They gave us olive oil in to-go pouches just like ketchup and I’m still holding on to mine.
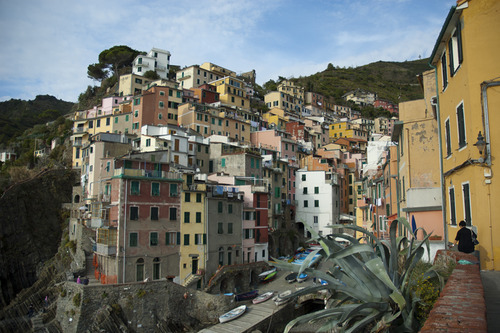
I bought a basil plant the other day and I knew it was time to recreate a piece of this memorable Italian meal. Now of course my pesto wasn’t as good as theirs. . . I mean, how could it be? But it was delicious, and it was fun to travel back to that special moment in time.
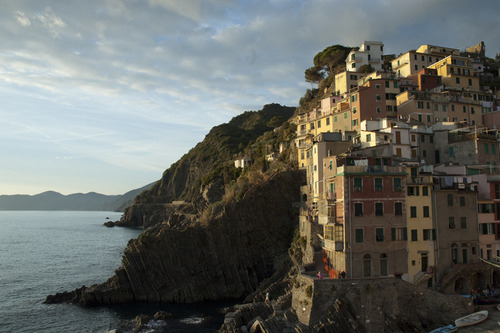
We swam here and we could go out so far and so deep without getting into rough waters or feeling unsafe. It was truly incredible.

Ingredients
{1 1/2 cups fresh basil leaves (packed)♥ 1/2 tsp salt♥ 1/2 tsp pepper♥ 1/4 cup parmesan cheese♥ 2 tbsp pine nuts (I didn’t have any so I used pistachios)♥ 1 tsp minced garlic♥ 1/2 c extra virgin olive oil♥ 1 package gnocchi}
Directions
In a food processor, combine everything but the oil and process for a few seconds. While processing, add the oil in a thin stream.
Cook gnocchi according to directions on the package. Mix the pasta with the pesto and enjoy!
I have a confession to make. Lately brownies just haven’t been cuttin’ it. It’s almost like they aren’t chocolatey enough. And I’m usually never happy with the texture. I’d rather have fudge or a chocolate cupcake—not something in between. I’ve been searching for a super chocolatey recipe to replace my usual brownies that was also really easy—and preferably only made with ingredients I/you probably already have.

I finally stumbled across something perfect; something that meets all my needs. These are so delicious; it’s taking all my will power not to eat the whole pan. I’m headed to the beach tomorrow and I’d like to be able to take some with me. Also I’d rather not have a belly full of these things when I’m rolling around in the sand.
Don’t worry brownies. I haven’t turned my back on you forever. I still love you fresh out of the oven smothered in ice cream and chocolate fudge.
Bar
{1 cup flour ♥ 1/2 cup light brown sugar ♥ 1/2 stick butter, coldish}
I ran out of regular flour so I had to throw in some whole wheat flour. That makes these healthy right?
Toffee
{1/2 cup butter, cut into pieces ♥ 1/2 cup light brown sugar }
Chocolate Topping
{half-bag milk chocolate chips}
Directions:
1. Preheat oven to 350 F.
2. In a bowl mix the flour and brown sugar. Cut in the cold butter using a fork.
3. Grease a 8x8 inch pan and press the flour mixture into the bottom of the pan.
4. In a small sauce pan melt the ingredients for the toffee. Stirring constantly. Cook over medium heat until boiling and let boil for about 30 seconds. Pour immediately over the crust.
5. Bake for 15-20 minutes until topping is bubbling and crust is golden brown. Remove from the oven. Immediately sprinkle the chocolate chips over the bubbling toffee. Cover every inch!
6. Try to let it cool (lots of will power involved). Cut into squares!
I’ve been wanting to try a recipe with Biscoff for a long time. I’ve had a love affair with Biscoff cookies for years; certainly years before they became a common product in grocery stores and WAY before the Biscoff spread. I flew a lot as a child and I always wanted to fly Delta because they served these amazing cinnamon cookies—my favorite thing about airplanes (and the Cran-Apple juice which you apparently can’t buy anywhere on the ground).
I made this pie in honor of my cat’s birthday. Even though she couldn’t eat it; she did try.


Recipe follows.
Crust
{ 24 Biscoff cookies ♥ 1/4 c butter (melted) ♥ 2 tbs granulated sugar }
1. Preheat oven to 375 F.
2. Crush your cookies in to crumbs. I used a bag and a rolling pin for this.
3. Mix in melted butter and sugar. Pour into 9x9 pan and press down.
4. Bake for 7 minutes. Let cool completely before adding the mousse.

1. In the bowl, beat the cream cheese, biscoff spread, and sugar just until combined.
2. Add the vanilla.
3. Beat in 1/4 cup of the Cool Whip just until it is incorporated.
4. Fold in the rest of the Cool Whip and pour over your cooled crust.

5. Put a few dollops of fudge on top of your mousse and use a knife to make a swirled pattern.

6. Refrigerate for 2 hours before eating.
P.S. I cut the recipe in half which is why my mousse isn’t very deep.
Well, yesterday was a big day for my first baby Squirty. She turned 20! My family adopted her when I was 5, and we’ve been best friends ever since. She’s lived in my parents house for the last 10 years, and I just recently moved her to my apartment. She transitioned swimmingly and is loving her grown-up house. Here she is enjoying the sun and wind on her birthday.

And here she is trying to eat some mousse cake I made. I mean there were candles…and I was singing to her…so I can see why she thought it was her cake. Her cat-cake was a can of tuna and some special cheesy cat food.

It’s amazing what a blessing animals can be in our lives. Here’s to another 20 years together!

How unbearably cute is she here?!
Well, you think you know it all, and then you get a piece like this. The one that tries to break your resolve and make you question whether or not you can handle your chosen career path. Okay, maybe a little dramatic, but this did take hours and a very unexpected and unfortunate 8 coats of paint in some areas. In the end though, it was totally worth it, and I love the results.
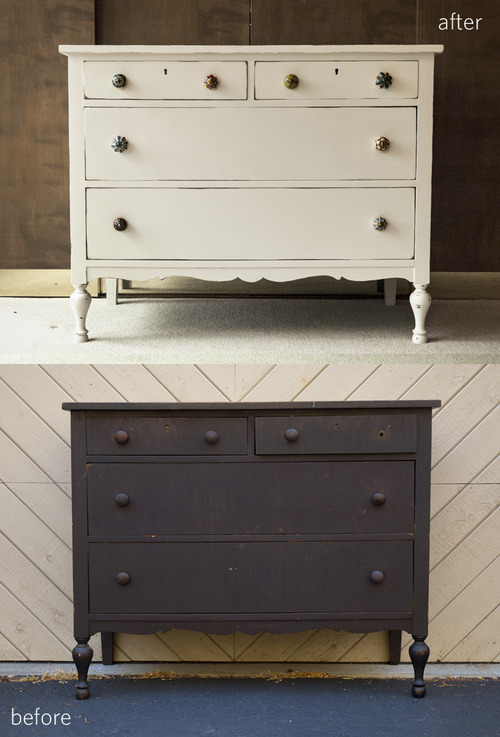
I really love antiquing. It’s so much fun, and after meticulously applying perfect coats of paint, it’s fun to be a little more carefree and artistic. Even though the dark stain was a pain during the process, I love how it looks peaking through the cream.
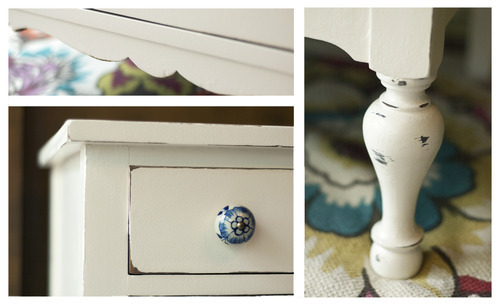
Read more to see my process.

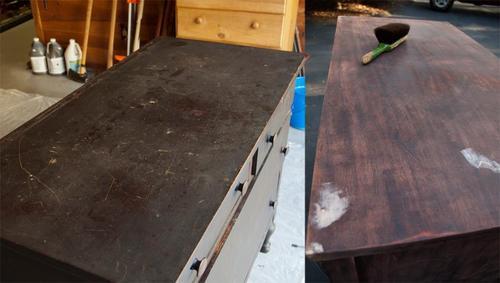
1. Strip the paint. The most arduous and time-consuming process. Only do this if you absolutely must.
2. Give the whole thing a nice sanding with an orbital sander and dust it off. (I’m very proud to use my Grandpa’s old shop brush made of horse hair.)
3. Fix any structural damage. I only had to use wood filler on some surface issues. IMPORTANT: If you are antiquing afterwards you’ll want to remember where you filled the wood so you don’t sand back down to these spots. Document with photos and use them as reference when you are antiquing.
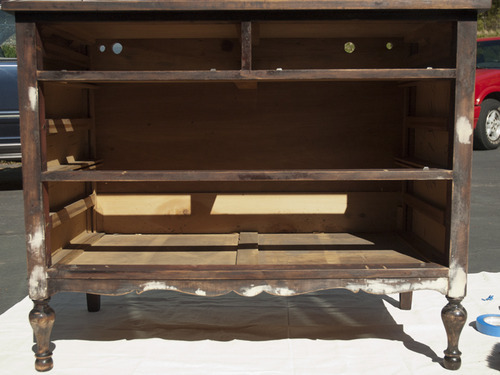
4. Prime. I use spray prime because I think it’s much easier and also because it seems to sand away more easily during the antiquing process.
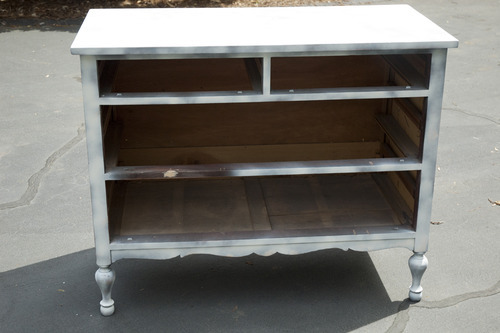
5. Paint! Let dry and secure knobs.
I never make blondies because my goal is typically to consume as much chocolate/square inch as possible in any given dessert. But there’s a first time for everything, and these blondies did not disappoint. My issue with blondies is they typically have too much of a cake or cookie texture, but luckily these came out soft and gooey.

Mine are filled with chocolate covered peanuts, butterscotch, and chocolate, but I called them Blondie Bombs because you could really put anything your heart desires into them (Also because Chocolate Butterscotch Chocolate-Covered-Peanut Blondies seemed a bit long). And as an important side note: When I make brownies I always dive right into the center, and avoid the edge until the very last minute. But the edges of these were delicious—they caramelized and were more like candy than anything else.

Of course my cat, Squirty, likes to be in the middle of all things. She was sitting on the window sill watching the action, and this was her face when I brought the blondies over to the table. Like “omg new smell…must investigate.” The girl will literally eat anything but her favorite foods are pizza and Doritos. My other cat won’t entertain the idea of anything except dry cat food – she won’t even eat cat treats.

Give these a shot and tell me what would go into your favorite Blondie Bomb. P.S. The batter is delicious. I’m surprised I had enough left to fill up the pan! Recipe follows.
Ingredients:
{ 1 stick unsalted butter, melted ♥ 1 egg ♥ 1 cup light brown sugar, packed ♥ 1 tablespoon vanilla extract ♥ 1 cup all-purpose flour ♥ 1 cup chocolate covered peanuts ♥ 1/3 cup butterscotch sauce (pre-baking) ♥ 1/4 cup butterscotch sauce (post bake) ♥ 1/4 cup chocolate fudge (post bake)}
1. Preheat oven to 350 F. Line an 8 x 8 inch pan with foil and spray with cooking spray.
2. Melt the butter.
3. Allow the butter to cool slightly and add the egg brown sugar and vanilla and stir vigorously.
4. Add the flour and stir until just combined. The batter will come together quickly so be careful not to over-mix it.
5. Fold in the chocolate covered peanuts.
6. Pour into pre-greased pan and drizzle with the butterscotch sauce.
7. Bake at 350 F for 28-32 minutes.
8. Once done drizzle with the butterscotch and fudge sauce. 
Basic blondie recipe courtesy of Averie Cooks.
I like to do a DIY project every now and then, and when I discovered the amazing and talented Plasti Dip, I knew I had to find a use for it. I love the look of classic silver pet dishes, but my cats and dogs are ravenous eaters and they tend to shove these all around the house and make a ton of noise while they are eating. Soooo, insert Plasti Dip! It’s kind of like a liquid rubber that will dry solid but flexible. I just dipped the rims of the dishes in and now they are cute and immovable.

I couldn’t find the multi color Plasti Dip, so I just purchased the Blue and Yellow to make these two shades of green. It can be a bit tricky to use, but it is forgiving. I messed up one of these and, with a little effort, was able to peel it off after it dried.

Read more for cute pics of my babies using their new bowls.

