fortune cookies

Well it’s one month from Valentine’s Day…and if your life is as full of “pinterest-fails" as mine is, then you better start planning your V-day treats now. My sister introduced me to chocolate-dipped fortune cookies almost 2 years ago and I figured now would be the perfect time to try them. 

image

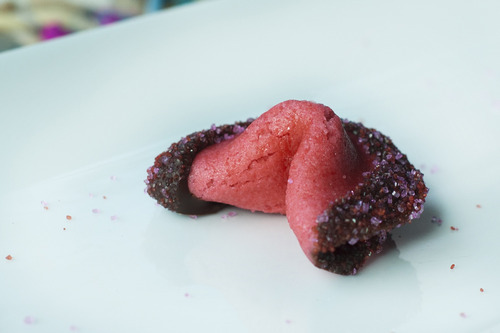
This fold is one of those techniques I definitely thought I would screw up. But it actually wasn’t as difficult as you might think—you just have to move quickly. 
image

[ingredients: 1 egg white | 1/2 tsp vanilla extract | 1.5 tbsp vegetable oil | 1/4 c flour | 1/2 tsp cornstarch | 1/4 c granulated sugar | red food coloring | chocolate chips]

makes about 8 fortune cookies 

Preheat oven to 300 degrees Fahrenheit. Have your fortunes written and ready-to-go.

Grease

baking sheet.

Whisk

the egg white, vanilla extract, and vegetable oil together until frothy. Add the flour, cornstarch, and sugar to this mixture and

combine

. Add enough red food coloring to achieve a deep pink. 

Spoon

out about a tablespoon of batter onto your pre-greased cookie sheet. If necessary, smooth the batter a bit with your spoon to form a perfect circle. They should be about 3” in diameter. Once the cookies come out of the oven, you have to work very quickly so its

best to only bake

2 cookies

at a time

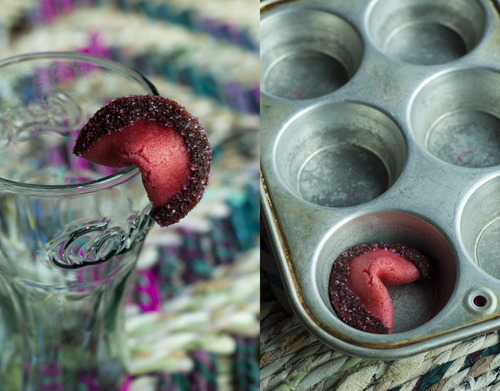
Bake for about 7 minutes. Quickly remove the cookies and use a spatula to flip them onto a dish towel. Insert a fortune and fold both cookies in half. Carefully (because the cookies will be hot) place the cookie on the edge of a glass and pull both sides down to form the typical fortune cookie shape. Then, put your cookie into a muffin tin to hold its shape. Repeat steps until batter is gone. 

Naturally

,

 I forgot to take these pictures

before

I decorated them…
image

Melt chocolate chips over a double boil and dip your cookies any way you like! Refrigerate and enjoy! And since we were talking about my sister(s)…here’s a picture of us from about 20 years ago! I’m the little one.

image

cheesy orzo

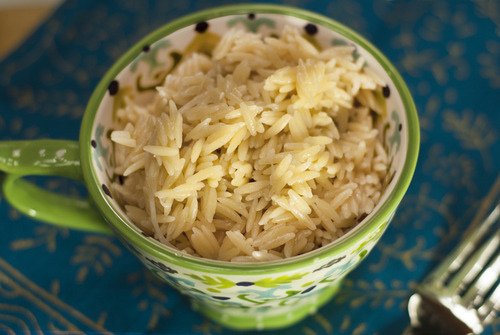
I learned this recipe when I was about 12 years old at Cooking Camp. Ahh Cooking Camp…what memories. While I learned some invaluable lessons in those classes I never did really turn into much of a cook. I’m just a baker at heart. But I can, however, make this orzo. It’s simple and delicious and it just looks so cute in a coffee mug. Plus it’s only 4 ingredients.

image

ingredients
2 c. chicken broth | 1.5 tsp minced garlic | 2 c. orzo | 3/4 c. grated parmesan cheese

Set 2 cups chicken broth to boil and add the garlic. Once boiling, add the 2 cups orzo. Stir, remove from heat, cover, and let sit for 25 minutes until all the broth has absorbed. Fluff orzo with a fork and stir in the parmesan cheese. 

This will last for about 2 weeks in the fridge. 

Red Velvet Cheesecake

I always make dessert for our annual family Christmas party with the Kenney’s (you know those long-time family friends who have a son your age that you are supposed to grow up and marry). This year my dad requested Red Velvet Cake, but I wanted to make it more complicated (I have a lot of free-time right now). I LOVE the Cheesecake Factory’s version of red velvet cake and I knew that making my own version could turn into an impressive Christmas treat. 

I think this recipe might even make it into my top 5!

image

image

To me, the perfect cheesecake is all cheese and no cake, and this recipe really delivers. It’s so dense and creamy - not a bit cakey. 

image

[cheesecake ingredients: 20 oz cream cheese (at room temperature) | 1 cup sugar | 1/4 tsp salt | 2 eggs (at room temperature) | 1/2 cup sour cream (at room temperature) | 1 tbsp all purpose flour]

Preheat your oven to 325° F and set a pot of water to boil. Grease a 9” springform pan and line the bottom with parchment paper. Wrap the bottom of your springform in foil and set into a larger roasting pan. Later, we’ll pour the boiling water into this larger pan and the wrapped foil will protect any water from seeping into the cheesecake. 

With a mixer beat the cream cheese until fluffy. Add sugar and beat until incorporated and smooth. Stir in the salt and eggs. Add the sour cream and finally, stir in the flour. 

Pour cheesecake batter into the springform. Pour boiling water into the larger outer pan about halfway up the cheesecake. Bake for 40 minutes or until the middle sets up. Wrap with saran wrap and refrigerate until cake assembly. 

image

[cake ingredientsred velvet box cake mix** | instant cheesecake pudding mix | an extra egg | cream cheese frosting**]

**Yes! I think it’s okay to use some pre-made ingredients (don’t hate me)...especially if the results decrease cost but NOT flavor! Simply make the cake according to the directions on the box but add the instant pudding dry mix and an extra egg. The cake will turn out really moist and won’t taste like it came out of a box

Assembly: Level off the cakes (I never/didn’t do this but it’s important here because if the cake isn’t level the cheesecake will slip off over time). Spread cream cheese frosting on your bottom layer of cake. Slap…no wait… gently transfer the cheesecake to the top. Spread another layer of cream cheese frosting and then top the whole thing with your last cake. Frost the whole thing and decorate as you please. 

This was really a delicious dessert and it looks pretty impressive. This would be great for Valentine’s Day…hell, why not dye the cheesecake and frosting pink! 

Croatia

I spent about two weeks in Croatia during my latest European adventure. It was one of my favorite places. We swam in the Adriatic every day and for some reason it was a swimming experience unlike any other. We could swim out so far and deep without any fear - which is so unlike swimming on the East Coast here. I swear it washed away all my worries.

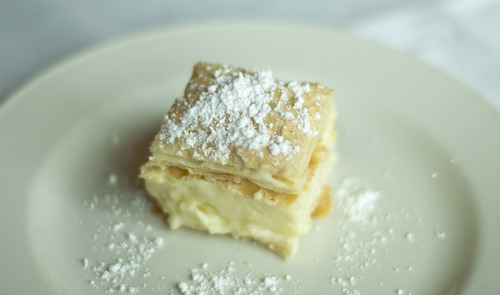
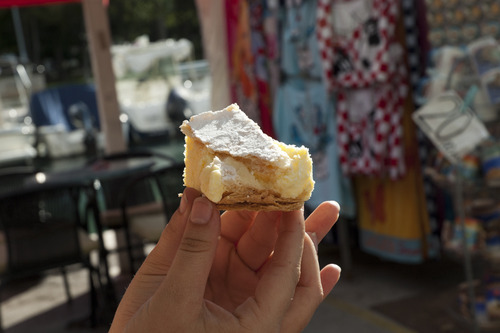
My friend and I “worked” our way through Europe - helping families in exchange for food and housing. We stayed in Stobreč and honestly our host was awful. She was a slave driver who cared little about us and our Croatian experience. She just wanted her house cleaned and cleaned perfectly. BUT the one great thing she did was introduce us to a wonderful Croatian desert called Krempita. The best way I can describe it is a sort of thick, fluffy, sturdy, yellow custard in between two thin pastries.

image

I found a recipe, altered it a bit, and tried it this weekend. The custard turned out really delicious but not exactly the proper texture. This is more creamy and jiggly when it should be more fluffy and sturdy. But the taste was right! It was very nice to have a bit of Croatia at home. 

Here’s me thoroughly enjoying my new favorite place to swim. 

image

And here’s a nice authentic Krempita. You can see it needs to be quite a bit fluffier. But I’ll keep trying! 

image

[ingredients for a jiggly krempita: 2 sheets puff pastry | 3 cups milk | 2.5 ounces cornstarch | 1 tbs vanilla | 4 egg yolks | 4 ounces sugar | 4 ounces whipping cream (whipped with stabilizer)]

Directions

Let the puff pastry sheets thaw and bake according to directions. Once cooled, cut them to the shape of an 8 x 8 inch pan. Then, cut one sheet into serving-sized squares. This will be the top of your krempita. This step is very important! 

For the cream - mix egg yolks with sugar until they become frothy. Add 1/2 cup of milk and corn starch and mix well. Boil the remainder of the milk with the vanilla. Once it comes to a boil, mix in the yolk/sugar mixture and stir for one minute. Transfer the mixture to a large bowl and let cool completely. Whip the whipping cream with a stabilizer (I used corn starch) and then add to the completely cooled cream. 

Assemble with whole pastry on the bottom, then cream, then the pre-cut squares on top. Refrigerate for a few hours dust with powder sugar and serve! A little Croatian delicacy at home! 

holiday toffee

This is a fun recipe because once you have the toffee down you can pretty much use any ingredients you can think of - milk chocolate chips mint chocolate chips butterscotch chips topped with peppermint pistachios almonds anything.

image

For the toffee:

- 1 cup salted butter
- 1 cup sugar
- 2 tbs. water

Combine in pan. Bring to boil over medium low heat while stirring occasionally. Heat the mixture to 300-305 F and immediately pour onto a pre-greased cookie sheet. (If you don’t have a candy thermometer you can use the crack test but it is a bit more difficult) 

Give the toffee a few moments to set up and once there is a bit of a hard skin on top pour your chips on top. They’ll soften with the heat and soon you’ll be able to spread them all over the toffee. Top of the chocolate with your crunchy bits and then pop it into the freezer. 

swiss-inspired

Well I spent an incredible 3 months in Europe and along with a million awesome experiences I also collected many new favorite foods. So I’m going to be sharing some of them and my best attempts to recreate them.

First is this Züpfe bread which I first tasted in Wald, Switzerland. I was there on a sort of work exchange program where I helped a woman repaint old furniture in exchange for food and housing. She was so wonderful and loved introducing me to delicious Swiss foods.

Rising.

I made a tiny Züpfe with the leftover dough.

I’ve never actually baked bread before, but this was really fun and it turned out really well. We ate it on Thanksgiving along with the chocolate pie below. 

[ingredients: bread flour | salt | egg | active dried yeast | honey | lukewarm milk | melted butter]

recipe credit: Chef in You

chocolate chess pie

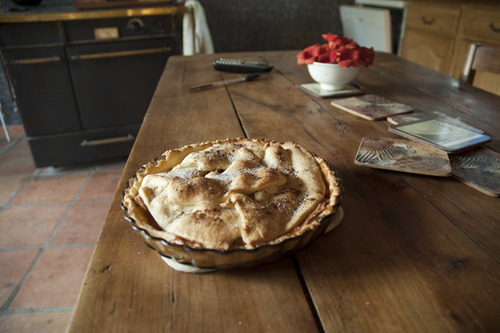
I tried to make this thing last Thanksgiving and somehow utterly ruined the recipe. All the ingredients separated while baking and typically I’ll eat anything sweet but this was simply unsalvageable. So this year I knew I had to attempt to reconquer this foe and I’m pleased to report it turned out quite delicious. 

cripsy top with a dense fudgy interior 

Recipe courtesy of Ezra Pound Cake.

greetings from abroad

Wow. It’s been a long time since I posted! Life has changed a lot. I ended my two graphic design jobs in July, and started a new adventure in Europe. I’ve been here for over a month and have seen many many wonderful places. But now I am settled in France for a while, living in an old French farm house equipped with a few of the infamous Poitou Donkey. 

 I’ve even had enough time/space to bake…

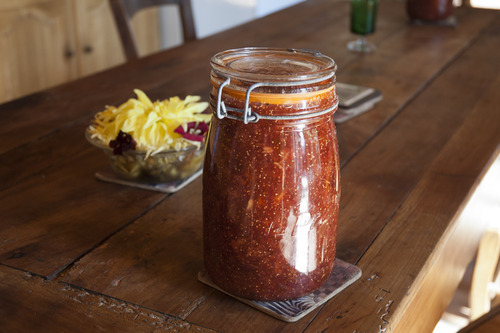
and jam!

Easter

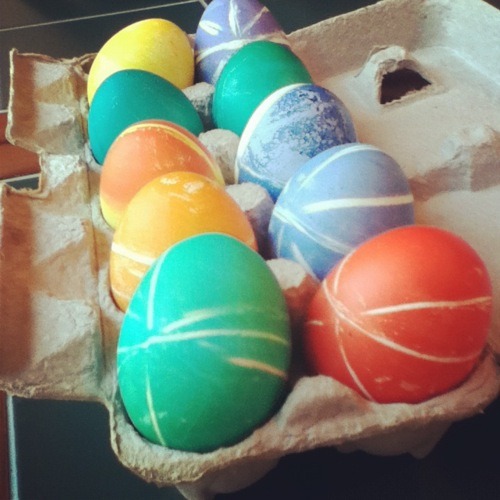
My brother and I dyed some eggs. Do you ever age out of that? Yes. No. I’ve been dyeing eggs the same way for 20ish years now so we tried a new rubber band technique. Truly thrilling. 

Also these bird’s nest cookies. 

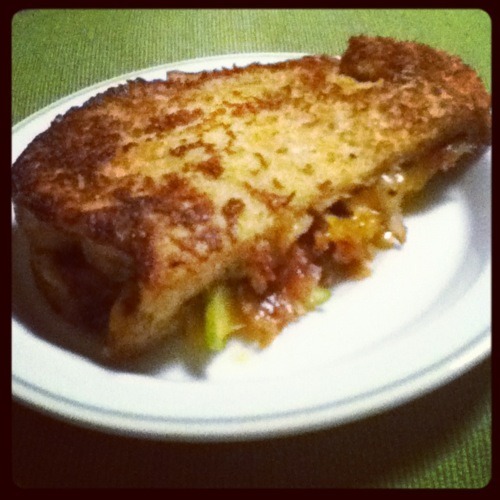
And check out this amazing sandwich I had today at lunch. Granny Smith apples, bacon, sharp cheddar, on french toast with powdered sugar and syrup. Served with a side of jalapeño bacon mac & cheese. You could easily make this sandwich at home.

Sorry for the not so great food pictures. I’m not usually an instagrammer, but I don’t always have my camera with me. Can’t believe they got bought today for $1 billion. I wish someone would buy my blog for $1 billion.